CommCat Live Subscription
CommCat Live is the web subscription service for CommCat. When you purchase CommCat Live or upgrade from CommCat, a one-year subscription for your web site is included. After the first year you can choose to continue using your web site for a nominal subscription fee that is used to help defray the costs of maintaining the CommCat Live server.
To learn more, visit the CommCat web site: http://www.commcat.com.
Once you have a subscription, a web page is created for you on the CommCat Live server and CommCat is ready to help you personalize it.
You can check you CommCat Live subscription status at any time by selecting Check Live subscription... from the Help menu.
To start CommCat Live, click Enable CommCat Live in the File, Settings, Program, Startup, Internet window. Restart CommCat, then check the CommCat Live status at the bottom of the main CommCat window. If the status light is green, you are ready to go.
If the CommCat Live status indicator is red, make sure you have subscribed to CommCat Live and have been notified by e-mail that your site is ready. This process can take up to 24 hours.
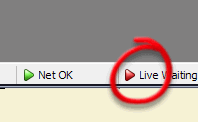 Live Not Connected |
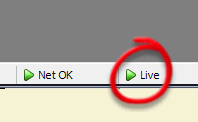 Live is Connected |
CommCat Live Settings
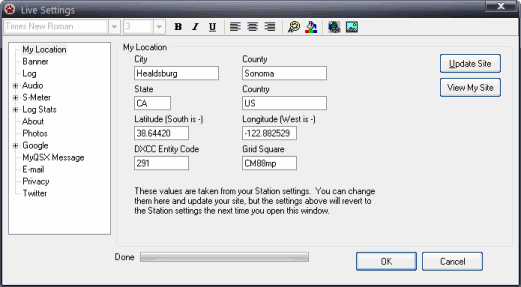
CommCat Live settings are made through the CommCat Live settings window: File, Settings, Live.
When CommCat starts it checks the CommCat Live site to make sure you have a valid CommCat Live subscription. If an active account is not found, the Live settings menu option is disabled.
CommCat Live settings are divided into 8 categories.
1. My Location: your location as displayed on your site
2. Banner: design the call sign logo that is shown in the banner at the top of your Live web pages
3. Log: display the latest contacts from you log on your site
4. Audio: assign the sound card for CommCat Live recordings; record audio clips for use in CommCat's voice keyer; manage the audio clips you have uploaded to your site and configure editing options, set up VoIP for CommCat Mobile
5. S-Meter: enable the uploading of s-meter data and calibrate the meter
6. Log Stats: compute statistics from your log to display in the Live pie chart
7. About: enter text telling about yourself
8. Photos: upload photos to you Live site and create a slide show
9. Google: set up Google calendar for CommCat and Google map on your Live site About page
10. MyQSX Message: enter the default comment that is displayed in your info balloon
11. E-Mail: allow visitors to send you e-mail from your site
12. Privacy: hide information on your Live site when you are inactive
13. Twitter: send log info to CommCat Twitter account
See the topics below for details on each of the settings.
My Location
Use the My Location settings to specify your current location. These settings may be different from your CommCat settings, but the CommCat settings for these items appears when you open the window.
Banner
The right side of the banner at the top of each CommCat Live page is reserved for your call sign. You can use simple text for your call, or create a fancy graphic logo.
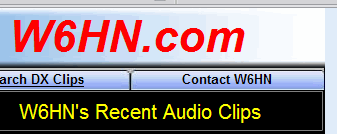
HTML Text
The fastest way to add your call to the banner is using CommCat's built-in HTML editor. The image above shows W6HN.com added to the banner.
Select the option Use HTML Text then click Get Call to download the current HTML text. Select the text you want to change and type the new text.
To change the font size or color, select the text and use the Edit toolbar at the top of the settings window to make any adjustments you wish. Note that changes are limited to the entire block of text. It is not possible to use different colors or different font settings within the block of text.
The text can have a solid or transparent background. By selecting Transparent, the shaded blue background from the banner will show behind the text. If you do not select transparent, the text background is a solid color that masks the banner.
Click Save Call to upload the text to your site, and View My Site to see the results.
Graphic Logo
Using your favorite graphics program you can create your own logo. In addition to your call, you might want to add your location to the logo, or include some other image.
Two backgrounds that match the banner background are available for your use. If you are using an Adobe product, such as Photo Shop Elements, to do image editing, use the PSD background. The jpg format is available for graphics editors that do not support PSD.
Click Download Background to download the format you have selected and save the file in a convenient location. Open the file with your image editing program and add any text and graphics you wish. Save the edited background in the GIF format and upload it to your site using Save Call.
View your new call sign logo by clicking View My Site.
Log
If you wish to show your last 4 logged contacts on your Live site, check Include Latest Logged.
Your site has a folder to save archives of your log. If you wish CommCat to ask to save your log archive on the site, check the Ask to Upload Logbook ZIP option.
An option is provided to mirror logged contacts on the MyQSX site. This requires that you have set up a CommCat Mobile account. Contact CommCat Technical Support if you wish to use this feature but do not have a CommCat Mobile account. With this feature enabled, each time you log a contact, the contact details are also sent to a personal logbook on the MyQSX site.
Audio
Preferences
If you wish to prevent any clips from being uploaded to your site, remove the check from Enable Upload in Audio Clip Options.
If you have Audacity or Wavosaur, popular free audio editing programs, selecting Edit with Audacity or Edit with Wavosaur will provide you the opportunity to edit all audio clips before they are uploaded. Click the navigation button to locate the program you wish to use for audio editing.
Recorder
The Recorder settings tab is used to select the audio source to record, set the proper levels and to provide the tools to record clips for the CommCat voice keyer.
Select the Sound card and Mixer you wish to record. If you are recording Voice Keyer clips, select the Microphone as the source. Click Record and adjust the Record Level so the audio peaks are approximately 25% of full scale. Click Stop to turn off the Recorder, the Play to see how it sounds.
If you are recording audio clips to be uploaded or audio to be streamed you your Live site, select source to which your radio is connected. Usually this will be Line Input. Experiment to get the proper Record Level setting.
Voice Keyer
Clips you have recorded in the CommCat Voice Keyer can be played back when you are in a voice mode (SSB, USB, LSB, AM, etc.). Each clip is associated with an F key at the top of your keyboard. If you wish to use F1 for Voice Keyer clips instead of Help, go to File, Settings, Program, Help and remove the check in Use F1 for Help.
Record a clip using the recorder functions at the top of the tab. Play a new recording back to make sure it says what you want. Next select an unused F-key button (one that is not shaded blue. Next click Save. Form now on when you press the corresponding F-key and you are using a voice mode, the clip will be played back.
To delete a clip, select an F-key that is shaded blue, then click Delete.
To play a Voice Keyer clip you have recorded for an F-key, select the key and click Play.
To save a short description of the F-key audio clip, click select an F-key and click Caption.
Once you are done recording Voice Keyer clips, set the recorder up for your receiver so you can record and upload DX Clips.
Clips
You can store an unlimited number of sound clip recordings on your CommCat Live site. The 10 most recent clips are played using the player on your home page. All clips, no matter who recorded them, can be found through the DX Clip search pages on the CommCat Live site.
A clip that appears in you player can be deleted and its description can be edited using the Audio Clips tab in Live settings. Once a clip has scrolled off the list in the player, it becomes a permanent addition to the clip library.
Clips are normally added using the CommCat Audio Toolbar located at the top of the CommCat main window. You can also add clips to your player through the Audio Clips settings tab, but they are not added to the clip library and will disappear once they scroll off the bottom of the clip list. Clips must be in the mp3 format.
Click Get Playlist to download the current Playlist from your site.
To add an external clip, click Add Clip. (Remember that clips are normally added through the Audio Toolbar, not through the settings window.) The Audio Clips window opens allowing you to navigate to and select the mp3 clip you want to add. Once a clip is selected, click OK to add the clip to your playlist.
To remove a clip from the playlist, select the clip and click Delete Clip.
To edit the DX Call, Description. or Source, set the insertion point in the box you want to change. Edit the text.
Upload the Playlist and any clips you have added by clicking Save Playlist.
VoIP
VoIP (Voice-over-IP) provides a duplex audio connection between CommCat and CommCat Mobile. Using this audio connection you can operate CW or SSB while away from your home location. This feature must be activated by CommCat support. If you are using CommCat Mobile, please contact support to have Live audio enabled in your account.
Once your account has been set up for Live audio, place a check in the Enable VoIP check box. Select the incoming and outgoing audio source.
S-Meter
Include S-Meter on Site
To show your s-meter data, check the Include S-meter Data option in the Enable panel. Your radio s-meter data must be available to CommCat through the CAT port to use this feature. Many older radios do not provide s-meter data through the CAT channel.
Click Test S-meter to send a simulated signal to your web site. Open your site in a browser to see the results.
Appearance
In the Appearance, select the colors you want to use for the Low, High, and Average plots. Select Line, Area or Column format from the Chart Style list.
To save your settings on your Live site, click Save Design.
Calibration
Use the following procedure to calibrate the s-meter readings from your radio as they are sent to the CommCat Live s-meter graph. The calibration process uses 2 s-meter points, S9 and S9+40, to adjust the reading before it is sent to your site.
1.Select the S9 radio button and set your s-meter on your radio to S9 using your RF gain control.
2.Click Set S-Meter
3.Select the S9+40 radio button and set your s-meter on your radio to S9+40 using your RF gain control.
4.Click Set S-Meter
If you wish to repeat the calibration procedure, click Reset and start over.
Log Stats
Your CommCat Live home page displays statistics of your operating activities, computed from your log. The Log Stats settings tabs hold the options and settings to create and display the statistics in a pie chart format.
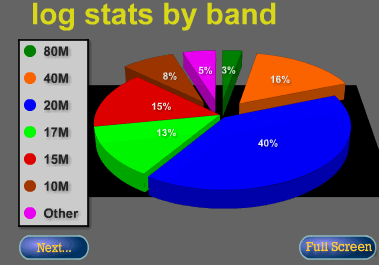
The Log Stats Data tab collects the statistics for the three charts on your site: stats by band, mode and by entities worked/confirmed. Click Get Stats to collect the data. (Save the stats on your site in the Appearance settings window.)
Too many pie sections will make the stats panel look cluttered. It is best to keep the number of pie sections to 6 or fewer. To reduce the number of pie sections, delete the sections that have the smallest numbers. Select the section you want to delete, then click Delete. The percentage of the section you delete is added to the Other section. The Other section, if it is used, can't be deleted.
The individual pie sections can be moved away from the center of the pie to provide emphasis and interest. Edit the number in the Distance column to move a section. 0 keeps the section at the center, and 100 moves it out one radius so the tip of the pie section falls on the outer edge of the pie circle.
Click Appearance to modify the way the charts look and to save your stats on your Live web site.
Check the option 3D Pie Chart if you want to show the pie chart in a 3-dimensional format. The transition selection sets how the chart will be added to the web page when a visitor first arrives or clicks Next... to go from one chart to the next.
Set up the colors you want to use for your stats display.
To upload the stats to your site, click Save Stats. If you upload new stats but your web site doesn't reflect the changes, you may need to refresh your web browser several times or delete your browser's cache since it is storing the old view.
About
The CommCat Live About page is a place where you can add biographical text about yourself, a photo slideshow, and a Google map showing your location. Please see the Photo Album topic for details on how to create a slideshow and set up the Google map.
Download your Bio Text from you site by clicking Get Bio Text. The text is shown in the Bio Text box. In the text box you can add new or modify existing text, change font style and color, and add graphics images.
Select text you wish to modify, or place the insertion point where you wish to add new text. Type the text you wish to be included in your Bio.
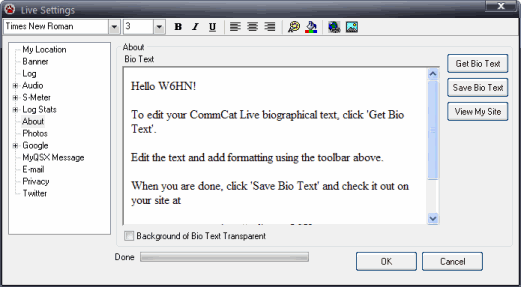
Using the Edit toolbar you can modify the way the text looks and add links or images.
To change the font face or size, select the text you want to change and use the font face and size drop down lists to set a new value. If you wish the text background to be the same as the Bio Text frame, click Background of Bio Text Transparent.
To make selected text appear bold, italic, or underlined, click the respective button on the toolbar.
Text can be left justified, centered or right justified by selecting the text you wish to format and clicking the one of the justification buttons on the toolbar.
Use the palette button to change the color of selected text, and the bucket to change the background color.
To add a link to selected text, click the link button. A Hyperlink window opens providing a place for you to enter the Internet link you wish to use. The link feature is a good way to show links to other sites that may be your favorites. When a visitor to your site clicks the link, their browser will go to that site.
You may add images to the text by selecting the insertion point, then clicking the Image button. The Picture window opens providing you a place to find any gif or jpg image you want to add. Enter the Alternate Text you wish to show, then click OK. The new image appears in your text where you can left, center, or right justify is and change its shape by dragging one of the hooks provided for that purpose in each corner of the image.
When you are happy with the text and layout, click Save Bio Text.
Photos
The CommCat Live About page holds Bio text, an optional Google map showing your location and a photo album. See the previous Help topic for entering and formatting Bio Text.
In the Photo Album settings tab you can add or remove photos from the album, change their position in the slide show, and change the transition between photos.
Photos should be in the jpg or gif format, and the ideal size is 320 pixels wide by 240 pixels high. If your photos are formatted with a different aspect ratio than 4:3 they will not fill the available area. If they are larger than 320 by 240 pixels they will be scaled down but will occupy more memory than necessary and will take longer to load.
Click Get Album to download the current album from your site. The list of photos in your album is shown in the Photos list.
To add a photo to the list, click Add Photo. The Photo window opens allowing you to navigate to and select the photo you want to add. Select the photo and click OK.
To delete a photo from the album, select the photo you want to remove and click Delete.
To change the position of a photo in the album, select the photo and click Move Up or Move Down.
To add a caption to a photo, set the insertion point in the Photo Description box for the photo you want to change. Edit and add text that appears at the bottom of each photo in your album.
Each photo has a transition that determines how the slideshow moves from one slide to the next. Choose the transition from the drop down list for each photo.
To display the Album on your site, place a check in Show Album and then click Save Options. The Save Options process only shows or hides the album on your site.
To save the Photo Album on your site, click Save Album. Before uploading, CommCat asks if you want the slideshow to start automatically, or require the visitor to start the slideshow.
Google Calendar
Google Calendar is a useful utility that you can use to keep track of operating events, skeds, and other calendar items of interest. Ham radio calendar overlays are available through the Google site that provide contesting schedules. See the Amateur Radio Contest information by Luc, VA2KSH, maintained by Anthony, VA7IRL, using information from WA7BNM's Contest Calendar.
The Calendar is accessed from the Live window. Open the Live window by clicking the green Live button on the main CommCat toolbar.
To enable Google Calendar, check Enable Calendar in CommCat from the Google tab.
Once you have set up your calendar, you can access it directly without have to sign in to Google.
1.Click the down arrow next to your calendar name in My Calendars on Google Calendar.
2.Click Calendar Settings
3.Click the HTML button in Private Address
4.Copy and paste the address provided by Google in the Calendar URL from Google box in Google settings.
Google Maps
The About page on your CommCat Live site can display a Google map showing your location. Enable this feature by checking the Include map on my CommCat Live About page option. You must also display a photo album on your Live site to include the map. See the Photo Album tab in Live Settings.
The Latitude and Longitude used to center the map on your location are taken from the Station settings in File, Settings, Station. In the Station Settings window, click the button next to Longitude to get your location as determined by your Zip code. You may also enter any other Latitude and Longitude you wish. Enter Latitude and Longitude as decimal numbers. Use a negative number for West Longitudes and for Southern Latitudes.
If you want to allow visitors to your site to zoom in on your location, check Allow Zoom. This option places a zoom control on your map. You can also set the initial zoom factor of the map. Enter a value of 1 to 10, with 1 being the farthest out.
Click Save Maps to change the settings on your site, and View My Site to see you About page.
MyQSX Message
When a visitor to the MyQSX site clicks your pin, and information balloon is opened. The balloon shows your current operating status, name, location, and a short message. Set the default message in this window. You can change the message any time you want through the MyQSX Message toolbar option on the Live window.
Check the Enable CommCat Live E-mail option if you wish to enable the e-mail page on your site. Enter your e-mail address in the My E-mail box. This is the address to which your e-mail will be sent. Since your e-mail address is not shown on your site, your privacy is protected.
With Enable CommCat Live E-mail checked and your e-mail address entered, click Save E-mail. To see the e-mail page on your site, click View My Site.
Privacy
If you don't wish to show recent operating activity when you disconnect from Live, check the option in the Privacy settings window to exclude log and last change time information. When your site displays 'Yourcall is not active', your last 4 log contacts and the line 'Last change...' do not appear.
You can upload a picture to show in the space left by your log. The picture must be in jpeg format with a 5 x 3 aspect ratio. Keep the size of the image less than 200 x 120 pixels. Click Add Photo to find an image on your hard drive. If you do not upload an image, your Live site displays a sleeping cat.
Click Update Site to save the privacy setting and image on your Live web site.
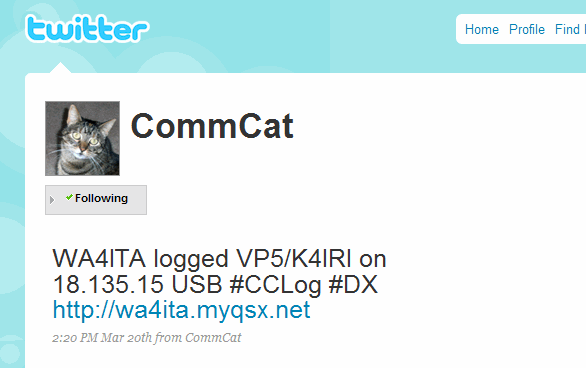
Twitter is a web site and service that is used to post short comments about your current status. See http://www.twitter.com for more information. We've set up a special CommCat Twitter account to display log info each time you log a contact. You can see the results at http://twitter.com/commcat
To send logged contact info to Twitter, check the option Send QSO data to Twitter. You can send a test message from the Twitter settings window to test your connection.
Testing Your CommCat Live Connection
The CommCat Live Connection Test window (File, Maintenance, CommCat Live Test) measures the time to connect to your Live site. Two separate tests are started by clicking Test Site or Test Account. The Account test goes through a series of steps to make sure CommCat has the necessary access to the folders on your site.
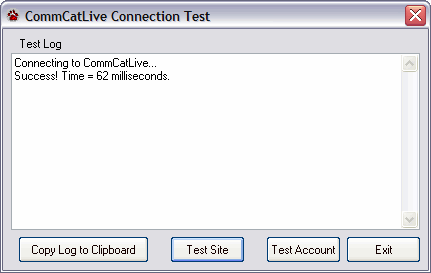
The elapsed time for the entire test should be less than one second for a normal connection.
Click Test Site or Test Account to start the test. If you wish to e-mail the results or save them in a file for future reference, click Copy Log to Clipboard. You can then paste the log into an e-mail message or to Notepad.
