UTC Time
Open the UTC Time window by clicking the Clock icon in the Navigation Toolbar, or by selecting Clock in the Tools menu. The UTC Time window can be re sized by dragging any one of its corners. The window can be moved outside the main CommCat window by checking the Clock option in File>Settings>Program>Outside Window.
Notepad
CommCat Notepad provides a convenient scratch pad for notes you can refer to while operating. For example, you might list antenna tuner settings, needed entities, or information about schedules or nets in which you participate.

Notepad data is contained in the current log. If you maintain several logs, independent Notepads are used for each.
Notepad has four folders. The three folders named Notes A, Notes B, and Notes C can be renamed. Right-click over Notepad and choose Rename Fold Tab to rename the current folder.
The fourth folder tracks the DX Focus call. This folder provides a way to keep notes and other information (including pictures) for specific calls. Pictures are stored in the Rich Text Format (RTF) which can be used by Microsoft Word and many other word processing programs. Images and photos stored using RTF can take up significant storage space. Note that images can also be stored for each QSO in the Advanced Log. Pictures stored in the Advanced Log are retained as bitmaps, which is a more efficient way to store data of this type.
The CommCat Edit menu is used with Notepad for the Copy, Cut, Select All and Paste commands. Text, images, and other objects can be copied from a word processing program to Notepad. You can also use drag-and-drop to move a photo from another application (such as a QSL card from eQSL) into Notepad. Images displayed in the Instant Web Page can also be moved to Notepad in this way. Notepad retains the font style, size, and color of pasted text.
Right click the Mouse to open a menu of options for Notepad, including auto entry of the current frequency, the current spot, and the selected Advance Log QSO. You can also drag-and-drop spots from the DX Spot Manager and Advanced Log to Notepad.
Tune the radio to the frequency in any line by using Ctrl-Click, or by choosing Tune from the right mouse menu. If the beginning of the line contains "DX: " plus a call sign, this call becomes the DX Focus call for CommCat. Notepad also interprets modes, so it is possible to override the normal band plan for special situations. CommCat responds to USB, LSB, CW, AM, FM, and RTTY modes.
Several examples are provided below:
Notepad line |
CommCat response |
|---|---|
DX: W6HN 14.003.55 |
Tune to 14.003.55, CW mode as determined by band plan, W6HN becomes DX Focus |
KCBS .740.00 AM |
Tune to AM broadcast station KCBS |
K2MSP 21.082.55 RTTY |
Tune to 21.082.55 RTTY, band plan ignored, DX Focus does not change |
DX: W1DSB 28.495.00 LSB |
Tune to 28.495.00 LSB (ignoring band plan USB), set DX Focus to W1DSB |
A shortcut key, Ctrl + P, is provided to quickly open Notepad from any window.
Overview
DX Atlas is a shareware program that offers a number of mapping, propagation, and entity resources. An evaluation copy of DX Atlas can be downloaded from http://www.dxatlas.com.
Using DX Atlas with CommCat
Install DX Atlas in the default directory (C:\Program Files\Afreet\DX Atlas) recommended by Afreet Software or any other folder you wish. In CommCat go to File, Settings, Program, External to set the options for DX Atlas. Set the path to DX Atlas and check toe Enabled option to have CommCat recognize DX Atlas.
When the settings allow CommCat to find DX Atlas, the DX Atlas option on the Tools menu appears. Click this button, or Tools, Accessories, DX Atlas to open the DX Atlas window. DX Atlas displays your location and the location of the current DX Focus Call. The color of the DX marker is determined by any applicable rules you have defined in the DX Spot Manager.
DX Atlas can also be synchronized with the DX Spot Manager. Right-click over the DX Spot List, and select DX Atlas from the menu. When you tune to a new spot by double-clicking a spot on the list, or by using the space bar, the DX Focus Call location is displayed on the map. To keep the DX Atlas window on top, select the Stay on Top option on the DX Atlas View menu.
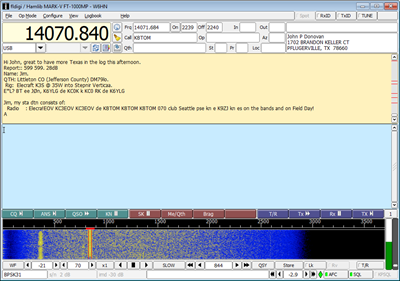
Fldigi
Fldigi stands for Fast Light Digital modem and is a free application created by W1HKJ (David Freese, Jr.) and associates. Fldigi is a free program.
Downloading Fldigi
The latest vserion of Fldigi can be downloaded from Source Forge using this link:
https://sourceforge.net/projects/fldigi/files/
Starting Fldigi
In CommCat, go to File>Settings>Station>Modes>RTTY Options. Select the Fldigi radio button. In the Fldigi.exe Path box, enter the complete path to the Fldigi executable program. Click the folder button to find it through File Explorer. Once you have completed these settings, you can start Fldigi from inside CommCat by clicking the RTTY patter button on the Main toolbar.
Data Flow
Frequency and DX call data is passed to Fldigi whenerever this information changes. If you double-click a spot in the DX Spot Manager. Fldigi is sent to that frequency and the DX call is shown in the Fldigi Call box. Mode is not transferred since there are many modes not identified by the frequency of the other station.
Changes made in Fldig are reflected in CommCat. If you change a call, frequency, or mode, the new values are sent to CommCat.
Radio Control
Fldigi controls your radio and CommCat controls Fldigi. To establish this connection, Fldigi is defined as a radio in CommCat. Open File>Settings>radio/Ant. Select Radio A, B, C, or D. The manufacturer for Fldigi is W1HKJ, and the model is fldigi. You radio can be connected directly to Fldigi, or you can use Flrig.
Logging
When a contact is entered in the Fldigi log it is automatically transferred to the CommCat Log. When ComCat starts it determines the logbook name currently used by Fldigi. If you change the Fldigi log name while CommCat is running, restart CommCat so it will know the new name.
Fldigi Modes
Fldigi supports over 16 main modes, with each mode having a number of sub modes. For example RTTY has 4 sub modes: RTTY-45; RTTY-50; RTTY-75N; and RTTY-75W. Fldigi sends the sub mode to CommCat for logging. The sub mode must be entered in CommCat's Mode List in File>Settings>Station>Modes>Names to be recognized. If a mode is not found in the list, CommCat displays UNK (Unknown) in the Advanced Log Mode box. The Mode is logged as UNK. If the sub mode is found, CommCat uses the ADIF Export Name when it logs the contact, not the Fldigi sub name. RTTY-45 is logged as RTTY, assuming you have created a new Mode called RTTY-45 with an ADIF Export Name of RTTY.
MixW
MixW is a multi mode program that works well with CommCat. From the MixW Help file, MixW stands for a Mixture of different modes. MixW fully supports CW, BPSK31, QPSK31, MFSK, RTTY, FSK31, Packet (HF and VHF), Pactor RX/TX (TX requires TNC), Amtor (Sitor) TX/RX (No TNC needed), Hellschreiber, FAX (RX only), SSTV, THROB, and MT63. Visit the MixW website at http://www.mixw.net to learn more about this product.
MixW was written by Nick Fedoseev, UT2UZ and Denis Nechitailov UU9JDR and the Help system is by Scott Thile, K4SET. The MixW icon is used with permission in CommCat.
The following features are provided by CommCat when MixW is running:
•MixW is started from a button on the CommCat Navigation toolbar.
•When MixW is started, CommCat releases control of the radio serial port to MixW.
•When MixW is closed, CommCat regains control of the radio serial port.
•A contact logged in MixW is automatically transferred to the CommCat log.
•Focus call signs in MixW are transferred to the CommCat DX Focus.
CommCat Settings for MixW
The settings for MixW in CommCat are located on the File, Settings, Program, External window.
Item |
Description |
|---|---|
Enabled |
MixW can be controlled from CommCat this box is checked. When enabled, and the MixW program file is present, a MixW button is added to the CommCat Navigation toolbar. |
CAT Auto Switch |
When MixW is started from CommCat by clicking the MixW button on the Navigation toolbar or from the Accessory menu, CommCat releases the serial port controlling the radio so that MixW can gain control. When the MixW window is closed, CommCat regains control of the radio. |
MixW Always on Top |
Check this option to require that the MixW window is always on top of other windows on your desktop. Note that this can cause other windows to be hidden behind the MixW window, but it guarantees that MixW will be visible when CommCat is running. |
Path |
The full path to the MixW program file, including the file extension. Click the open file button to browse for the MixW file. |
If you wish to have the CommCat Instant Web Page contents reflect the current focus call in MixW, check the option Refresh Instant Web Page when Focus Call Changes in the File, Settings, Program, Environment, Instant Web Page.
MixW Settings for CommCat
If using CommCat to control MixW as described above, make sure the Disable CAT option is not checked in the Configure menu.
To have new calls sent to the CommCat DX Focus, check the option Clear Call on Fq Change on the Options menu.
External Program
An external program of your choice can be opened from CommCat. The program can be Notepad, as shown above, or any other program you wish to use with CommCat.
Item |
Description |
|---|---|
Enabled |
The external program can be controlled from CommCat this box is checked. When enabled, a Windows button is added to the CommCat Navigation toolbar. |
Test |
The Test button is provided to confirm that the path you have specified to the external program is correct. Start the external program by clicking Test. |
Path |
The full path to the external program file, including the file extension and any parameters. Click the open file button to browse for the external program file. The example shown above opens Windows Notepad with a file named W6HN. |
DX Telnet
DXTelnet is a program by Fab, IK4VYX, designed to process spots from a number of sources. DXTelnet has been tested with CommCat using the following procedure:
If you are starting DXTelnet for the first time it will prompt you to enter your call sign. Type your call sign and press Enter.
•In the site list, select "Accept-1".
•Click the "Edit" button at the right.
•In the service type section, select "Other" (Default is DXCluster, so you will have to change it).
•Click "Edit script".
The default script looks like this:
/S !!!Welcome into $$$$'s Telnet Box
/S !!!Please Log in With your call sign
/S !!!login:
/C TERM 3
/F RELAY
Remove the first three lines of the script so it reads as follows:
/C TERM 3
/F RELAY
•Click OK to save script changes. You will get back to the previous form.
•Click OK again to save all changes.
•Click OK on the warning message box.
•Press ESC to hide the site list.
•Quit DXTelnet (Alt+F4).
Note: all the above operations must be performed only the very first time: a sort of one-shot configuration; the following part of this step by step is the only part to be repeated after the very first configuration.
•Start DX-Telnet by double-clicking its icon.
•In the site list select Accept-1 and press the Enter key.
Now start CommCat and go to File, Settings, Spots, Telnet. Change one of the four options to:
Name: DXTelnet
URL: 127.0.0.1
Port: 23
Once connected, start another DXTelnet session. Note: leave the previous DXTelnet instance (Accept-1) running when starting the second DXTelnet instance.
For example connect the second DXTelnet session to the CQDX-IRC node. The spots from the CQDX-IRC node should start flowing from DXTelnet to CommCat.
DXTelnet allows you to start as many sessions you wish and collect all the DX spots from all the sessions, filter them for dupes and send all the filtered DX spots to CommCat.
The Propagation Prediction window is provided by an external freeware program, Ham CAP. This program can be used to provide an indication of the band conditions between you and a DX station. The Propagation Prediction window is opened by clicking the Propagation menu item on the DX Spot Manager right mouse menu.
Ham CAP is provided by its author, Alex Shovkoplyas, VE3NEA. For download and installation instructions, please go to the HamCAP web site at http://www.dxatlas.com/hamcap
When you start Ham CAP from CommCat, CommCat provides your location, transmitter power, the DX Call, and band. Use the Ant tab to specify the antennas you are using on each band.
CommCat VP
CommCat VP is a separate program that can be used with CommCat to control the frequency and mode of other applications through virtual ports. Download CommCat VP from the CommCat downloads page. A separate Help file is provided with CommCat VP.